
Ever wanted a battery where you can easily replace a cell that goes bad, within 5 minutes? All while being cheap, reconfigurable, and durable? Look no further!
Warning! Read the disclaimer at the end of the post before making anything! Working with lithium ion cells is very dangerous!
I developed a solution to this problem after I encountered it myself. No solution I could find solved my problem the way I needed it done, the solutions that came close were either too niche or unavailable to acquire.
To get the files to build this project yourself, click here.
The Inspiration
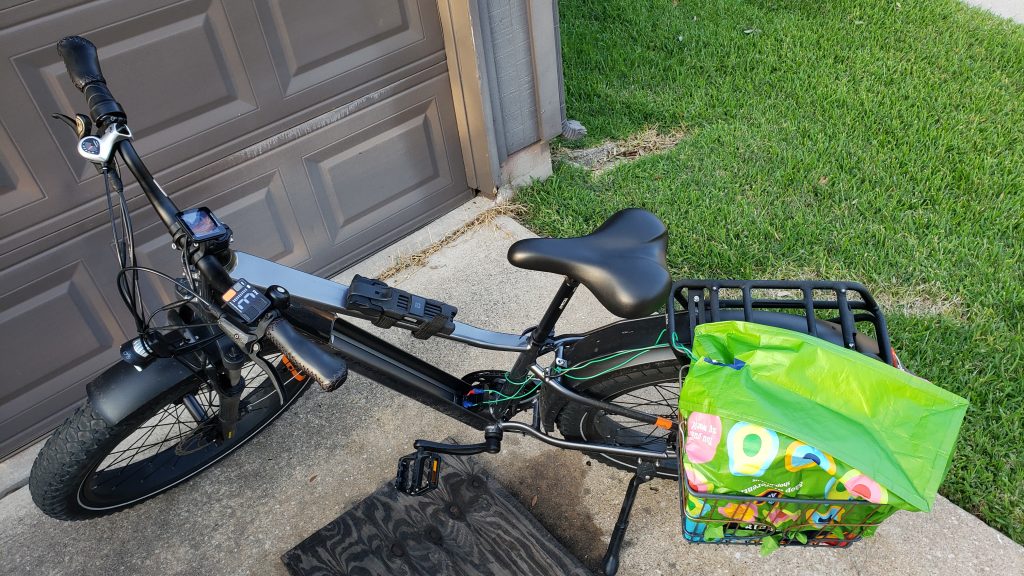
I have a Rad Rover 6 Plus that I got on sale. It turns out that there was a reason it was on sale. After about 8 months of relative bliss (aside from the hydraulic brakes failing), the battery failed. It was still under warranty, so I was sent a new battery. Surprise, surprise, it was DOA. At this point, I didn’t feel like bothering with it anymore, so it lay waiting to be dealt with for a future me.
Eventually I got curious as to whether the batteries had gone totally bad or only had a few parts that failed. So I cracked them open and took a look. At the that moment, I thought it was a lost cause. There was no voltage across any of the cells I tested, which was kind of weird to me. Too weird to not look into. I decided to do some research and I discovered that a complete lack of voltage across a 18650 means it could be in an over-discharge protection state!
I proceeded to connect the cells to my power supply at their ideal charge specs (variable power supplies are surprisingly fantastic at charging these cells with the right strategy). To my delight, they took a charge! Most anyway, some were really dead and I assume they are what took the batteries down. After getting a proper 18650 (I bought the Sofirn Universal 4 Bay Smart Battery Charger (paid link), which has served me well since I received it) , I processed all the cells. Fortunately I had enough functional cells to build a new battery.
The Challenge
At this point in my journey, I needed to find something to build my own battery pack. Knowing the dubious quality of the remaining functional cells I had, I decided to find a way to build a battery that I could take apart so I could replace individual cells at a moment’s notice. I was unable to find anything that met my needs, so I designed my own!
The Working Design
After months of working on the design while juggling class and my other commitments, I designed version 1.0! It was a fantastic feeling riding my bicycle again after so long, extremely satisfying. Instead of those cells going to waste or buying another bike, etc., I stuck with it! I was riding something I had used my talents and effort to make happen. The feeling it gave me is what I live for.
Bringing My Invention to You!
Taking a step back and looking at the investment of effort I put into this project, I figured other people could use what I invented. As a result I am released it to the public! I may sell the actual system at some point, but for now I am content to sell the STL files and let people print their own parts. I hope it brings other people the same joy at solving a problem as it did for me!
How to use The System!
Fortunately, it is super easy to use! Without further ado, read on!
Print the parts!
Print as many pieces as you need to build your desired size of battery, using the following suggested settings:
- 50% infill
- Support on build plate only
- 0.20 mm layer height
After printing, you remove the supports and make sure the parts are free of defects.
Take each A and B piece and slot them into each other, making sure the sealed wire connection holes are on opposite sides of each other to ensure the correct connections are formed.
The only exception to forming these unit are the beginning and ends of one of the halves of the battery. As you can imagine, if you used all the standards units to build the battery it would result in shorting the cells! As such, one half must begin and end with the A/B units being connected in the opposite configuration so that when both the top and the bottom of the battery are assembled into the full battery, each parallel group of cells is properly connected in series.
After making sure to follow that incredibly important process properly, assemble all remaining groups of properly connected A/B units into the full battery structure.
Now you are ready to proceed to the next step!
Weave the wire!
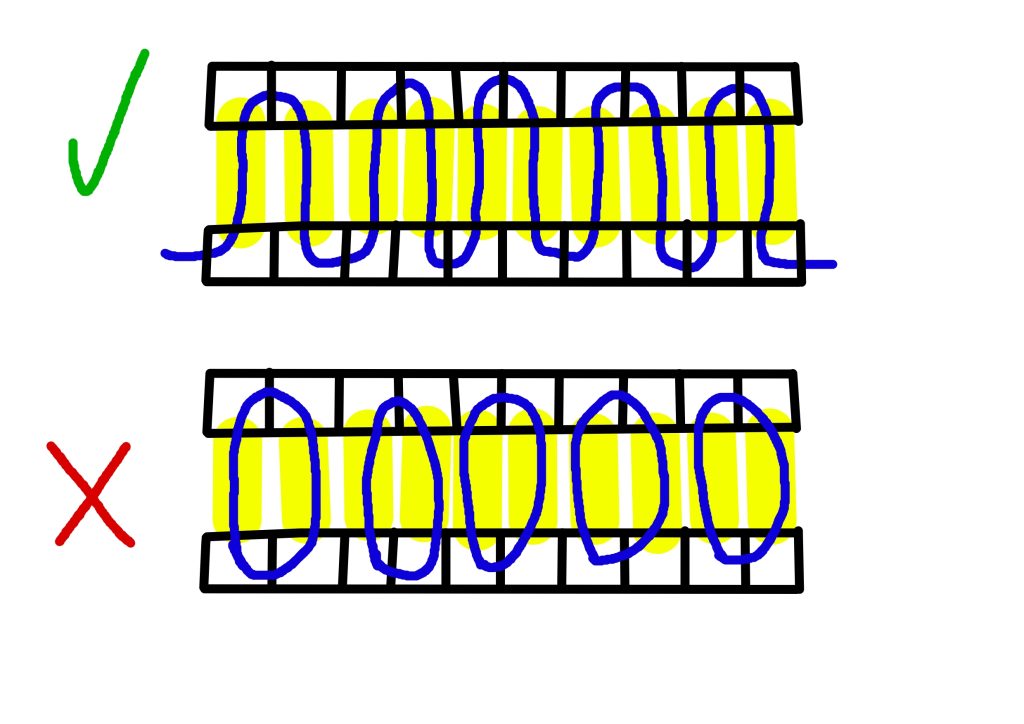
The wire I used is QWORK Flat Copper Braid Cable (paid link), it has served its purpose wonderfully. Cut it into sections approximately 3.4 centimeters long (1 1/4 inches) and weave them through the appropriate sections. I prefer using a consistent “S” pattern myself to minimize material waste of the copper wire. At the beginning and end of each “S” pattern, you will need to insert a short section of wire to ensure the spacing of the cells is properly maintained when the battery is fully assembled.
It should look something like this:
You’re basically done!
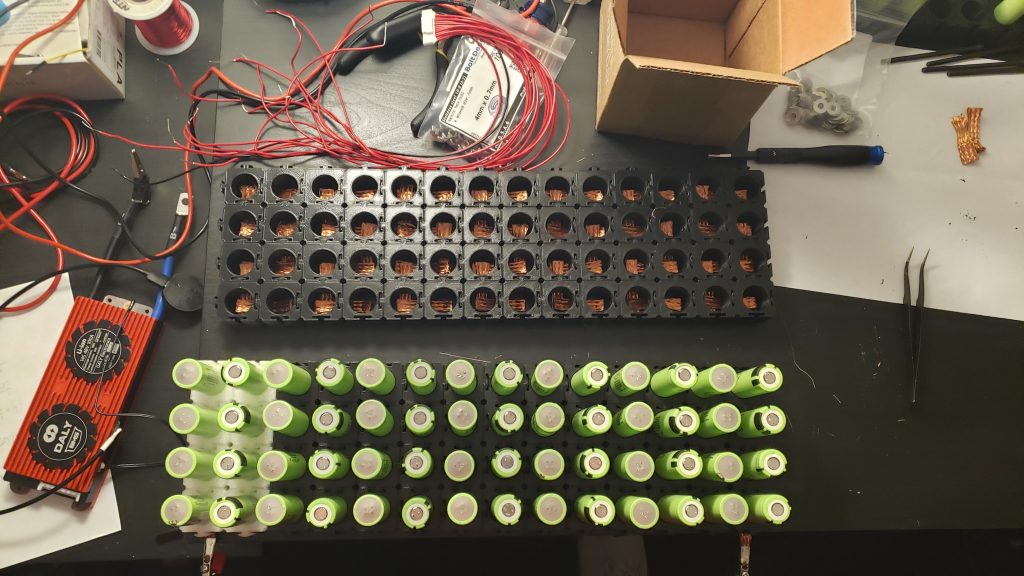
All that is left is to put in the the cells in the right pattern (if you are building this you should already have that basic electronics knowledge) and to insert the balance wires for whatever battery management system you chose. I personally opted for electrical tape to hold my balance wires in because I am still doing long-term stress testing on my primary unit, but I would recommend you secure your balance wires with hot glue. After that, all that is left is to secure both halves of the battery using M4, 80 mm bolts and their corresponding 4 mm nuts. To avoid excessive weight I recommend an alternating pattern across the battery, perhaps even fewer depending on your specific battery usage. Secure them to a gently tightened level as you will be compressing the cells. Fortunately, the flexibility of the copper wire will give you some leeway and help ensure consistent connections across all cells.
Make sure to test all relevant connections according to your BMS with a multimeter. Barring any missteps, you have assembled the battery!

You’re done!
Congratulations! You have built a complete battery using the system! Moving forward you will be able to replace any misbehaving cells or freely reconfigure the battery to your needs, all within around 5 minutes of work, no welding required!
Final thoughts
Thank you for reading my article! This is the first serious venture I have pursued, so any feedback is welcome! I appreciate everyone who reads this post and I wish you luck with any project in which you include my system.
DISCLAIMER OF LIABILITY
By purchasing and using the 3D model files for the Modular Battery System (the “Files”), you acknowledge and agree to the following:
- LIMITATION OF LIABILITY:
The creator of these Files disclaims any liability for direct, indirect, incidental, consequential, or punitive damages arising from the use, misuse, or reliance on the Files or any product assembled using it. You assume full responsibility for your use of the Files and any resulting products. - SAFETY WARNINGS:
The Files are designed for informational purposes only. Assembling a Modular Battery System involves inherent risks, including but not limited to electrical hazards, thermal runaway, explosions, or fire. Users must exercise extreme caution and follow all safety protocols when printing and assembling the system. Failure to do so could result in serious injury or death. - INSTRUCTIONS AND DISCLAIMERS:
While every effort has been made to ensure the accuracy of the instructions provided with the Files, the creator cannot guarantee that they are suitable for all users or all conditions. Users must verify the suitability of the design for their specific application and environment. The creator is not responsible for errors in the instructions or omissions therein. - INTELLECTUAL PROPERTY:
This Files are protected by copyright law. You may use the Files solely for personal, non-commercial purposes. Any commercial use or distribution of the Files without written permission from the creator is prohibited. Violations of intellectual property rights will be pursued to the fullest extent of the law. - THIRD-PARTY PRODUCTS:
The Files may reference third-party products, including 18650 batteries and other components. Users are responsible for obtaining and using these products in compliance with their respective manufacturers’ instructions and safety guidelines. The creator is not liable for issues arising from the use of third-party products. - LIMITATIONS ON WARRANTIES:
THE FILES ARE PROVIDED “AS IS” WITHOUT ANY WARRANTY, EXPRESS OR IMPLIED, INCLUDING BUT NOT LIMITED TO MERCHANTABILITY, FITNESS FOR A PARTICULAR PURPOSE, OR NONINFRINGEMENT OF INTELLECTUAL PROPERTY. YOU ARE SOLELY RESPONSIBLE FOR VALIDATING THE COMPLIANCE OF YOUR FINAL PRODUCT WITH APPLICABLE SAFETY STANDARDS AND REGULATIONS. - COMPLIANCE WITH LAWS:
Users are responsible for ensuring that any product assembled using the Files complies with all applicable laws, regulations, and safety standards in their jurisdiction. The creator is not liable for violations of such laws or standards by users. - INDIVIDUAL RESPONSIBILITY:
By downloading and using the Files, you acknowledge that you are doing so at your own risk. You agree to indemnify and hold harmless the creator of the Files from any claims, damages, or expenses arising from your use of the Files or any product assembled using it.
Note: This disclaimer is provided to ensure users understand the risks and responsibilities associated with using these Files. The creator reserves the right to modify this disclaimer at any time without prior notice.
Leave a Reply